Checkerboard tile patterns exude classic charm, making them a striking design choice for a variety of spaces. Their bold visual appeal not only adds character but also enhances symmetry and contrast in rooms of all shapes.
In this article, we’ll explore how different room shapes—from squares to irregular layouts—interact with checkerboard designs to maximize their potential. Additionally, you’ll discover practical tips and strategies to incorporate these timeless tiles seamlessly into your space, turning any room into an elegant and cohesive design statement.
Ideal Room Shapes for Checkerboard Patterns
To make the most of your checkerboard tile patterns, it’s essential to start with room shapes that naturally showcase their geometric appeal. Understanding which configurations work best will guide your design choices and ensure a balanced, visually striking result.
Square Rooms
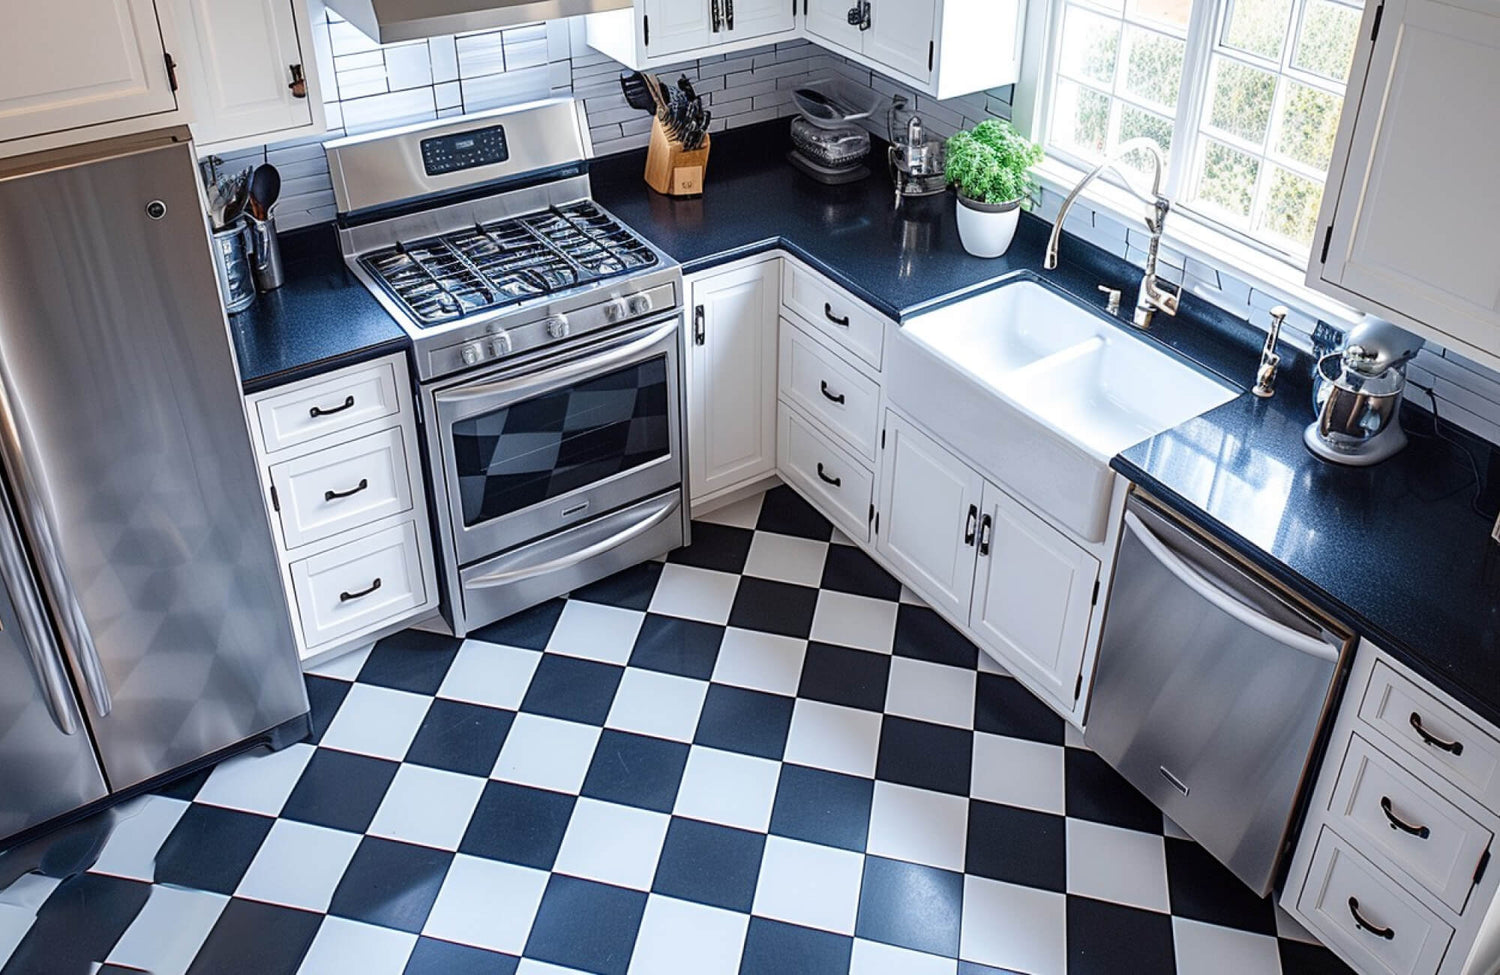
Checkerboard tiles thrive in square rooms, where their symmetrical design aligns perfectly with the room’s natural proportions, fostering balance and harmony. Kitchens and entryways particularly benefit from this pattern, as it enhances the sense of structure and order. Additionally, using contrasting grout colors can highlight the pattern’s boldness while preserving its timeless charm. For an added tip, reflective finishes on tiles can amplify light, further enhancing the open feel of square rooms.
Rectangular Rooms
Checkerboard patterns are an excellent choice for rectangular rooms, as they visually balance long, narrow spaces. In hallways or compact bathrooms, this design can make the area feel broader and more inviting. Larger tiles in rectangular layouts minimize grout lines, which simplifies cleaning while preserving a seamless aesthetic. Incorporating tiles with textured finishes also adds depth, ensuring the space feels rich and dynamic without overwhelming the overall design.
L-shaped Rooms
In L-shaped rooms, checkerboard tiles can act as a unifying element, seamlessly connecting the segmented areas into a cohesive layout. This approach is particularly effective in L-shaped kitchens, where the pattern can delineate zones like cooking and dining. Using different tile sizes in specific sections adds depth and helps define functionality without disrupting the room’s flow. You might also consider slightly varying the tile color tones to create subtle contrasts that maintain the overall visual appeal.
Irregularly Shaped Rooms
Checkerboard tiles bring order to irregularly shaped rooms by providing structure and directing the eye away from awkward angles or unconventional layouts. The strategic placement of the tiles can anchor the design, creating a balanced focal point in the space. You can also turn unique nooks or corners into highlighted features with checkerboard tiles, adding personality and character to the room. What's more, this design technique transforms irregular spaces into opportunities for distinctive style and charm.
If you want to see how the right checkerboard tile pattern can transform your space, use our augmented reality (AR) tool. It's a great way to test out different options and see how each tile layout affects your interior design before making a final decision.
Factors to Consider When Choosing Room Shapes
Choosing the right room shape isn’t just about aesthetics—it also involves functional considerations that influence the final look and feel. By examining key factors like size, lighting, and existing furniture, you can ensure that your room shape genuinely complements a checkerboard pattern and enhances your overall design vision.
Room Size and Layout
The size and layout of a room play a significant role in determining the success of a checkerboard pattern. For larger rooms, expansive checkerboard designs make a bold visual statement, while smaller rooms benefit from smaller tiles that help create the illusion of added space. To ensure harmony, adjusting the scale of the pattern to suit the room’s dimensions is key. On top of that, checkerboard tiles can be used to accentuate unique architectural features, such as alcoves or open floor plans, for a more dynamic spatial effect.
Lighting
Lighting enhances the checkerboard pattern by emphasizing its contrast and depth. Natural light reflects off the tiles, amplifying their brightness and making the room feel airy, while strategically placed artificial lighting can accentuate the tiles' angles and borders. Adding directional lights can also highlight the texture and color variations, further enhancing the room’s visual interest. Similarly, reflective elements like mirrors or glossy finishes can amplify light, making the pattern appear even more dynamic and vibrant.
Furniture and Decor
The checkerboard pattern should complement, not compete with, the existing furniture and decor. Choose furniture that echoes the geometric nature of the pattern or contrasts beautifully against it. Thoughtful furniture placement can also enhance the checkerboard design by using larger pieces to anchor the room while allowing the pattern to remain a prominent focal point. In addition, consider the colors and styles of your decor to ensure they harmonize with the boldness of the checkerboard, creating a cohesive and inviting environment.

Practical Tips for Installation
For a professional tile installation, it’s essential to thoroughly clean the surface to remove debris that could interfere with proper adhesion. Also, clearing the area of furniture and fixtures helps create a smooth workspace, ensuring your progress remains uninterrupted. Prioritize leveling the floor or wall, as uneven surfaces can disrupt the symmetry of the checkerboard pattern. Accurate measurements are just as important as well—they minimize material waste and help you achieve a precise fit, especially in uniquely shaped or compact spaces.
When choosing tiles, focus on options that combine durability with aesthetics to achieve a practical yet stylish checkerboard design. Ceramic and porcelain tiles are ideal for high-moisture areas since they are water-resistant and long-lasting. Additionally, you can enhance the room’s aesthetic appeal by selecting finishes like matte for understated sophistication or polished for light reflection.
Achieving a balanced checkerboard pattern requires precision and a bit of attention to detail. Start by identifying the room’s center point—this is key to establishing symmetry and a visually cohesive design. Using spacers between tiles also ensures consistent grout lines, contributing to a clean and polished look. You should check alignment regularly with a level, as well as focus on smooth transitions, especially in larger or irregularly shaped areas. These small efforts will significantly enhance the overall impact of the pattern.
Conclusion
Checkerboard tile patterns exude timeless charm and square rooms best showcase their elegance by perfectly aligning with the pattern’s symmetrical design. This harmony creates a striking aesthetic, making square layouts particularly ideal for kitchens or entryways. While rectangular rooms can add visual width and irregularly shaped spaces gain structure, square rooms remain the ultimate choice for highlighting the checkerboard’s classic appeal with a seamless blend of style and functionality.
If you’re considering checkerboard tiles or need expert advice on selecting the perfect patterns, colors, or materials, feel free to contact us! Our team is here to help you craft a design that seamlessly blends elegance with functionality, tailored to your unique space and vision.


