


Installing checkered floor tiles in your kitchen is more than a weekend project; it’s a bold design choice that blends style with structure. Every step matters, from selecting the right materials to laying each tile. In this article, we’ll walk you through the entire process, helping you plan thoughtfully, install precisely, and bring your kitchen to life with a timeless checkerboard pattern that feels classic and fresh.

Choose the Right Tile Style and Material
Before opening a box of checkerboard tile, it’s important to talk about what’s going on your floor. The type of tile you choose for your checkered kitchen layout plays a big role in how the space feels, functions, and holds up to daily use. Think of it as the foundation of your entire project, not just visually, but also practically.
Compare Materials for Kitchens
Not all tile types perform the same in a kitchen environment. If you’re aiming for long-lasting results, porcelain should be high on your list. It's incredibly dense and non-porous, which makes it better suited to handle moisture and resist stains, especially around sinks, dishwashers, prep zones, or floors. While vinyl offers a softer feel and lower cost, it lacks the resilience and polished look of porcelain. Natural stone, such as marble, brings a luxurious aesthetic but requires more upkeep to maintain its appearance.
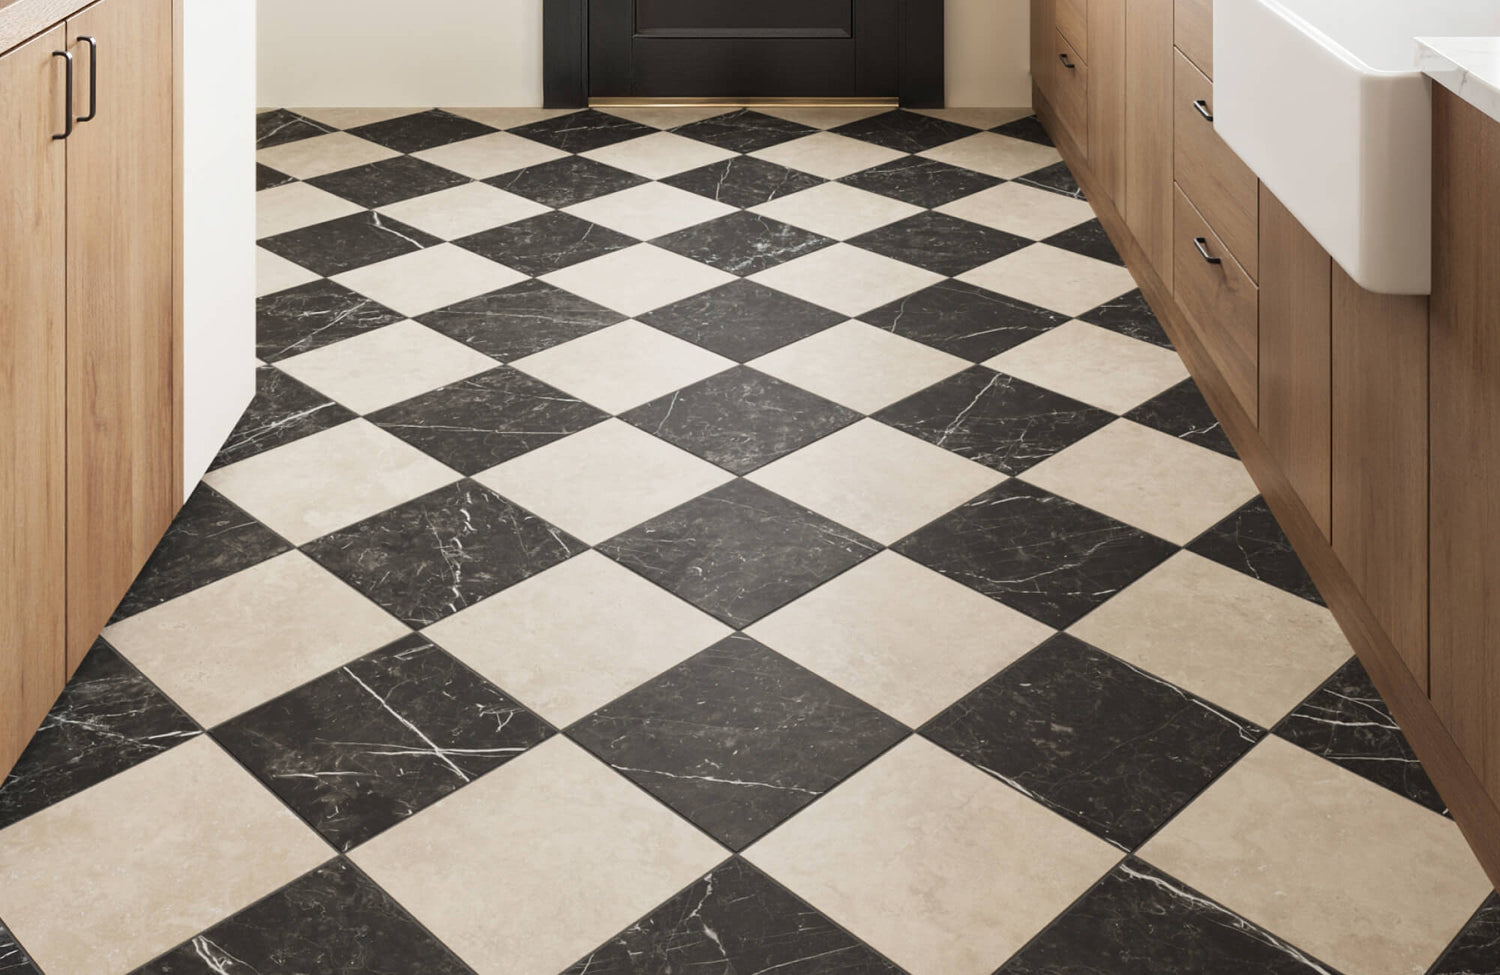
For this reason, porcelain emerges as a practical yet stylish solution for checkerboard floors in the kitchen. One standout option is the Palmer 12x12 Checkerboard Matte Porcelain Tile in White and Grey, as shown in the photo above. It delivers the elegance of a marble-inspired palette with the everyday durability of porcelain; a perfect combination for kitchens that blend style with function.
Decide Between Matte or Polished
Tile finish also plays a big role in the look and feel of your kitchen floor. Polished checkerboard tiles bounce light around the room, which can make the space feel brighter and a little more open. But they also tend to show smudges, spills, and streaks; something to keep in mind if your kitchen sees a lot of daily use. Matte checkerboard tiles, in contrast, have a softer, more modern feel and offer better grip, which can be helpful if you have kids or pets. They’re easier to maintain and still give your checkerboard floor that clean, stylish look without the added upkeep.
Think Beyond Black and White
Black and white may be the classic choice for checkered tiles, but it’s far from the only one. Softer palettes, like Edward Martin’s Leona 12x12 Checkerboard Matte Porcelain Tile in Marfil and Amani Grey, can create a more understated checkerboard look that works beautifully in farmhouse-style kitchens or open-concept layouts. If you’re looking to add a bit more personality, try pairing deep green with cream for a design that feels rich without being overpowering. Even subtle tonal pairings, like dark grey with mid-grey, can deliver a sleek, modern feel. You don’t have to stick to high contrast; there are plenty of combinations that can add depth and visual interest while keeping the overall vibe warm and inviting.

Plan Your Pattern Placement with Precision
A checkerboard floor can make a bold statement, but that clean, balanced look doesn’t happen by accident; it starts with thoughtful planning and precise layout. Skipping or rushing through this step can lead to a design that feels uneven or awkward, especially in the kitchen. Careful planning ensures a seamless result that ties the entire space together.
Our AR tool can also make the planning even easier by letting you preview the tile layout in your actual kitchen. You can test placement, alignment, and color combinations in real time, helping you make confident decisions before installation begins.
Measure and Find the Center
Your checkerboard floor should feel centered and balanced from every angle, and it starts with finding the true center of your kitchen. Instead of relying on what looks like the middle, take the time to locate the actual geometric center of the space. Using a chalk line or laser level, divide the room into quadrants and plan your layout outward from that point. This step helps the pattern flow evenly in all directions, avoiding uneven tile rows or awkward cuts along the edges. It can also make the design feel balanced, no matter where you’re standing.
Align With Focal Points
Laying out your tiles isn’t just about geometry; it’s also about guiding the eye. In most kitchens, features like the stove, sink, or island naturally draw attention and act as visual anchors. That’s why it’s important to align your tile pattern with these key elements; doing so helps the checkerboard feel intentional and connected to the space, rather than appearing randomly placed. For instance, when the center line of your tile layout runs directly through the center of the island, the entire floor looks more balanced and thoughtfully designed.
On the other hand, even small misalignments like a seam that’s just off-center beneath a cabinet can subtly disrupt the visual flow. These details may seem minor, but they can also play a big role in how polished and cohesive the finished space feels.
Dry Lay for Visualization
Before applying any adhesive, it’s best to start with a dry layout. This involves placing your tiles directly on the floor in the exact pattern you plan to install; no glue, no commitment, just a preview. This step gives you a full picture of how the colors play together, where cuts will fall, and how the pattern flows around obstacles like vents or cabinetry. It’s also your last chance to make any tweaks. You might realize that the visual center of the room feels slightly off from the geometric center, and that’s completely fine.
This step lets you shift things until everything looks right to your eye and aligns with the overall flow of your kitchen. Once you’re happy with the result, you can start the installation, knowing your layout works visually and practically.

Prepare the Subfloor Thoroughly
A checkerboard pattern depends on symmetry and clean lines, so any issues below the surface will eventually show through. Preparing your subfloor is important to ensure your tile installation looks flawless and stays in place for years. Skipping this part can lead to cracking, lifting, or uneven tiles that throw off the entire design.
While this step can be handled independently, it’s always wise to consult with a professional to evaluate the condition of your subfloor and recommend the best course of action. Their expertise can also help avoid costly setbacks and ensure the foundation is solid before installation begins.
Check for Moisture and Cracks
Start by assessing the condition of your subfloor. Whether you're working with concrete or wood, the surface needs to be dry, stable, and structurally sound. A moisture meter can help detect hidden dampness, particularly in areas near sinks or dishwashers, where moisture tends to build up over time. Damp subfloors can cause adhesive failure or even mold issues under the tile.
Additionally, it’s important to address any cracks, dips, or uneven spots early on. For concrete, fill gaps or damaged areas using a patching compound. If you’re working with wood, reinforce soft spots and fasten any loose sections with screws to eliminate movement. Although these fixes may seem minor, they can also make a big difference in giving your tiles a stable, long-lasting foundation.
Level and Clean the Surface
Even the highest-quality tiles can’t compensate for an uneven foundation. If the subfloor isn’t level, your checkerboard pattern can end up looking distorted, and the tiles may shift or settle unevenly over time. To avoid this, start by assessing the surface closely. For concrete, a self-leveling compound is often the most effective way to smooth out dips or ridges. On wood subfloors, you may need to sand down high spots or install a layer of plywood underlayment to create an even surface.
Once the surface is level, the next step is to make sure it’s completely clean. Give it a thorough vacuum to remove dust, grit, and any leftover debris; these small particles can also interfere with the adhesive and lead to weak spots or air pockets beneath the tile. A clean, dust-free base is key to helping your checkerboard pattern lay flat and look sharp from edge to edge.
Choose the Right Underlayment
After leveling and cleaning the surface, it’s important to choose an underlayment that properly supports your tile installation. The type you need depends largely on your existing subfloor. If your concrete base is already smooth and moisture-controlled, you may be able to skip this step. For wood subfloors, installing a cement backer board is a smart choice; it adds rigidity and enhances adhesion, giving the tiles a solid surface to bond to.
In some cases, especially in older homes where subtle movement is more likely, a decoupling membrane is also worth considering. It helps absorb that movement before it reaches the tile layer, reducing the chance of cracks over time. Choosing the right underlayment can also give your checkerboard floor the support it needs to stay even, secure, and visually consistent in the long run.

Step-by-Step Installation Process
Installing checkerboard tile can feel a bit daunting at first, but breaking the process into clear, manageable steps makes it much easier to approach. Whether you're doing it yourself or working with a professional, understanding each phase helps you stay in control and achieve a clean, cohesive, and professionally finished result.
Step 1: Mix Thinset Correctly
To start, prepare the thinset mortar; the material that bonds your tile to the subfloor. Getting the consistency right is the key: if it’s too thick, it won’t spread evenly; if it’s too thin, it won’t hold the tile in place. To avoid issues as you go, follow the manufacturer’s instructions closely, and only mix what you can use within 30 minutes to prevent it from drying out mid-application.
Once your mix is ready, use a notched trowel to spread the thinset over small sections of the floor. As a general rule, the size of the notches should match the size of your checkerboard tile; larger tiles typically need deeper notches to ensure full coverage and a solid bond.
Step 2: Begin at the Center
Now that your mortar is ready, it’s time to start laying tile. Begin at the center point you carefully mapped out earlier. Starting in the center helps ensure symmetry throughout the space and keeps your checkerboard pattern visually balanced.
Begin by placing your first four tiles in a plus-sign formation, alternating the colors to establish the core of the pattern. This initial step creates a strong visual anchor and keeps everything aligned as you go. From there, continue working outward in straight lines and frequently check the alignment and color placement.
To stay organized and avoid rushing, it’s also helpful to move in quadrants. This not only keeps your lines clean but also prevents the thinset from drying out before tiles are in place.
Step 3: Maintain Even Spacing
To keep grout lines clean and consistent, tile spacers are a must. These small tools can help maintain equal distance between each tile, which not only enhances the overall look but also allows for a strong, uniform grout fill.
Depending on the style you want to achieve, you can adjust the spacer width. Narrow spacing gives a more seamless, modern feel, while wider joints highlight the checkerboard grid. As you go, press each tile firmly into the mortar and check that it sits level with the ones around it. This added attention can also help prevent uneven edges and keep your pattern looking crisp from every angle.
Step 4: Cut Tiles for Edges
As you approach the edges of your kitchen, it’s time to shift from full tiles to custom cuts that fit neatly around cabinets, appliances, and walls. This step requires a bit more precision, but with the right tools, it’s completely manageable. For straight cuts, a manual tile cutter will do the job, while a wet saw is better suited for more intricate shapes around corners or fixtures.
At this stage, accuracy becomes especially important. Because checkerboard patterns rely on symmetry, uneven or jagged cuts can easily disrupt the overall look. To avoid that, always measure twice, mark your tiles clearly, and take your time before cutting. And if you're working with tougher materials like porcelain or stone, be sure to use a blade designed for that specific surface to avoid unnecessary chipping.
Step 5: Let Tiles Set Fully
Once all the checkerboard tiles are in place, it’s important to take a step back. Give the mortar time to cure undisturbed for at least 24 hours, avoiding any walking or movement across the surface. This pause may feel like a slowdown, but it’s also a crucial part of the process. Even small shifts during curing can affect alignment and cause lippage, where tile edges sit unevenly.
Although it’s tempting to check your progress up close, letting everything set properly ensures your hard work pays off in the long run. Once the tiles are fully set and stable, you’ll be ready to move on to grouting and finishing with confidence.
Step 6: Choose the Right Grout Color
Once your tiles are set, choosing the right grout color becomes the next big design decision, and it can have a big impact on how your checkerboard floor looks and feels. If you want to highlight the grid and make the pattern pop, go with a grout color that contrasts with your tiles. For example, white grout with black tiles or a dark grout with lighter tiles will give each square sharper definition.
On the other hand, if you prefer a more subtle appearance, a mid-tone grout that sits between your two tile colors can soften the contrast and create a more seamless, blended look. As you make your choice, it’s also important to consider upkeep. Lighter grout tends to show stains more easily in a kitchen, while darker grout may fade over time if not properly sealed. Finding the right balance between visual impact and long-term maintenance will help your floor look great and wear well over time.
Step 7: Apply Grout Evenly
Grouting is where patience pays off. Using a rubber float, press the grout firmly into the joints at a 45-degree angle, moving diagonally across the checkerboard tile pattern. This technique helps pack the grout deep into each gap, reducing the risk of air bubbles or missed areas that could weaken the bond.
After that, give it about 10 to 15 minutes to set slightly. Then, gently wipe the surface with a damp sponge to remove any excess grout, making sure not to disturb the joints. Rinse the sponge frequently and apply only light pressure to avoid pulling grout out as you clean. Once the entire floor is complete, allow the grout to cure fully according to the manufacturer’s guidelines; usually between 24 and 72 hours before moving on to sealing.
Step 8: Seal for Protection
Once the grout has cured, sealing is an important finishing step, especially in a kitchen setting where spills and splashes are common. Grout is naturally porous, which absorbs moisture and stains if left unprotected. Applying a grout sealer creates a barrier that helps prevent discoloration and makes cleaning much easier over time.
In addition, a penetrating sealer is ideal, as it offers lasting protection without altering the appearance of your grout lines. Sealing the tile surface is essential, particularly in natural stones, to protect them against stains and wear. However, with porcelain or ceramic tiles, you can focus on sealing just the grout, since the tile surface doesn’t require it. Though quick to apply, this final step can also play a key role in preserving the look and durability of your checkerboard floor.

Maintain Your Checkered Floor
With the installation complete, keeping your checkerboard floor looking its best comes down to consistent care. How you maintain it from day to day will have a big impact on its appearance and longevity. From simple cleaning habits to smart product choices, a thoughtful maintenance routine will also help preserve that crisp pattern and keep your kitchen feeling fresh and polished over time.
As you build your maintenance routine, it’s best to follow the care instructions provided by the tile and grout manufacturers. These guidelines are specific to the materials you’ve chosen and can help you avoid common issues while keeping your floor in top shape.
Add Rugs or Mats Strategically
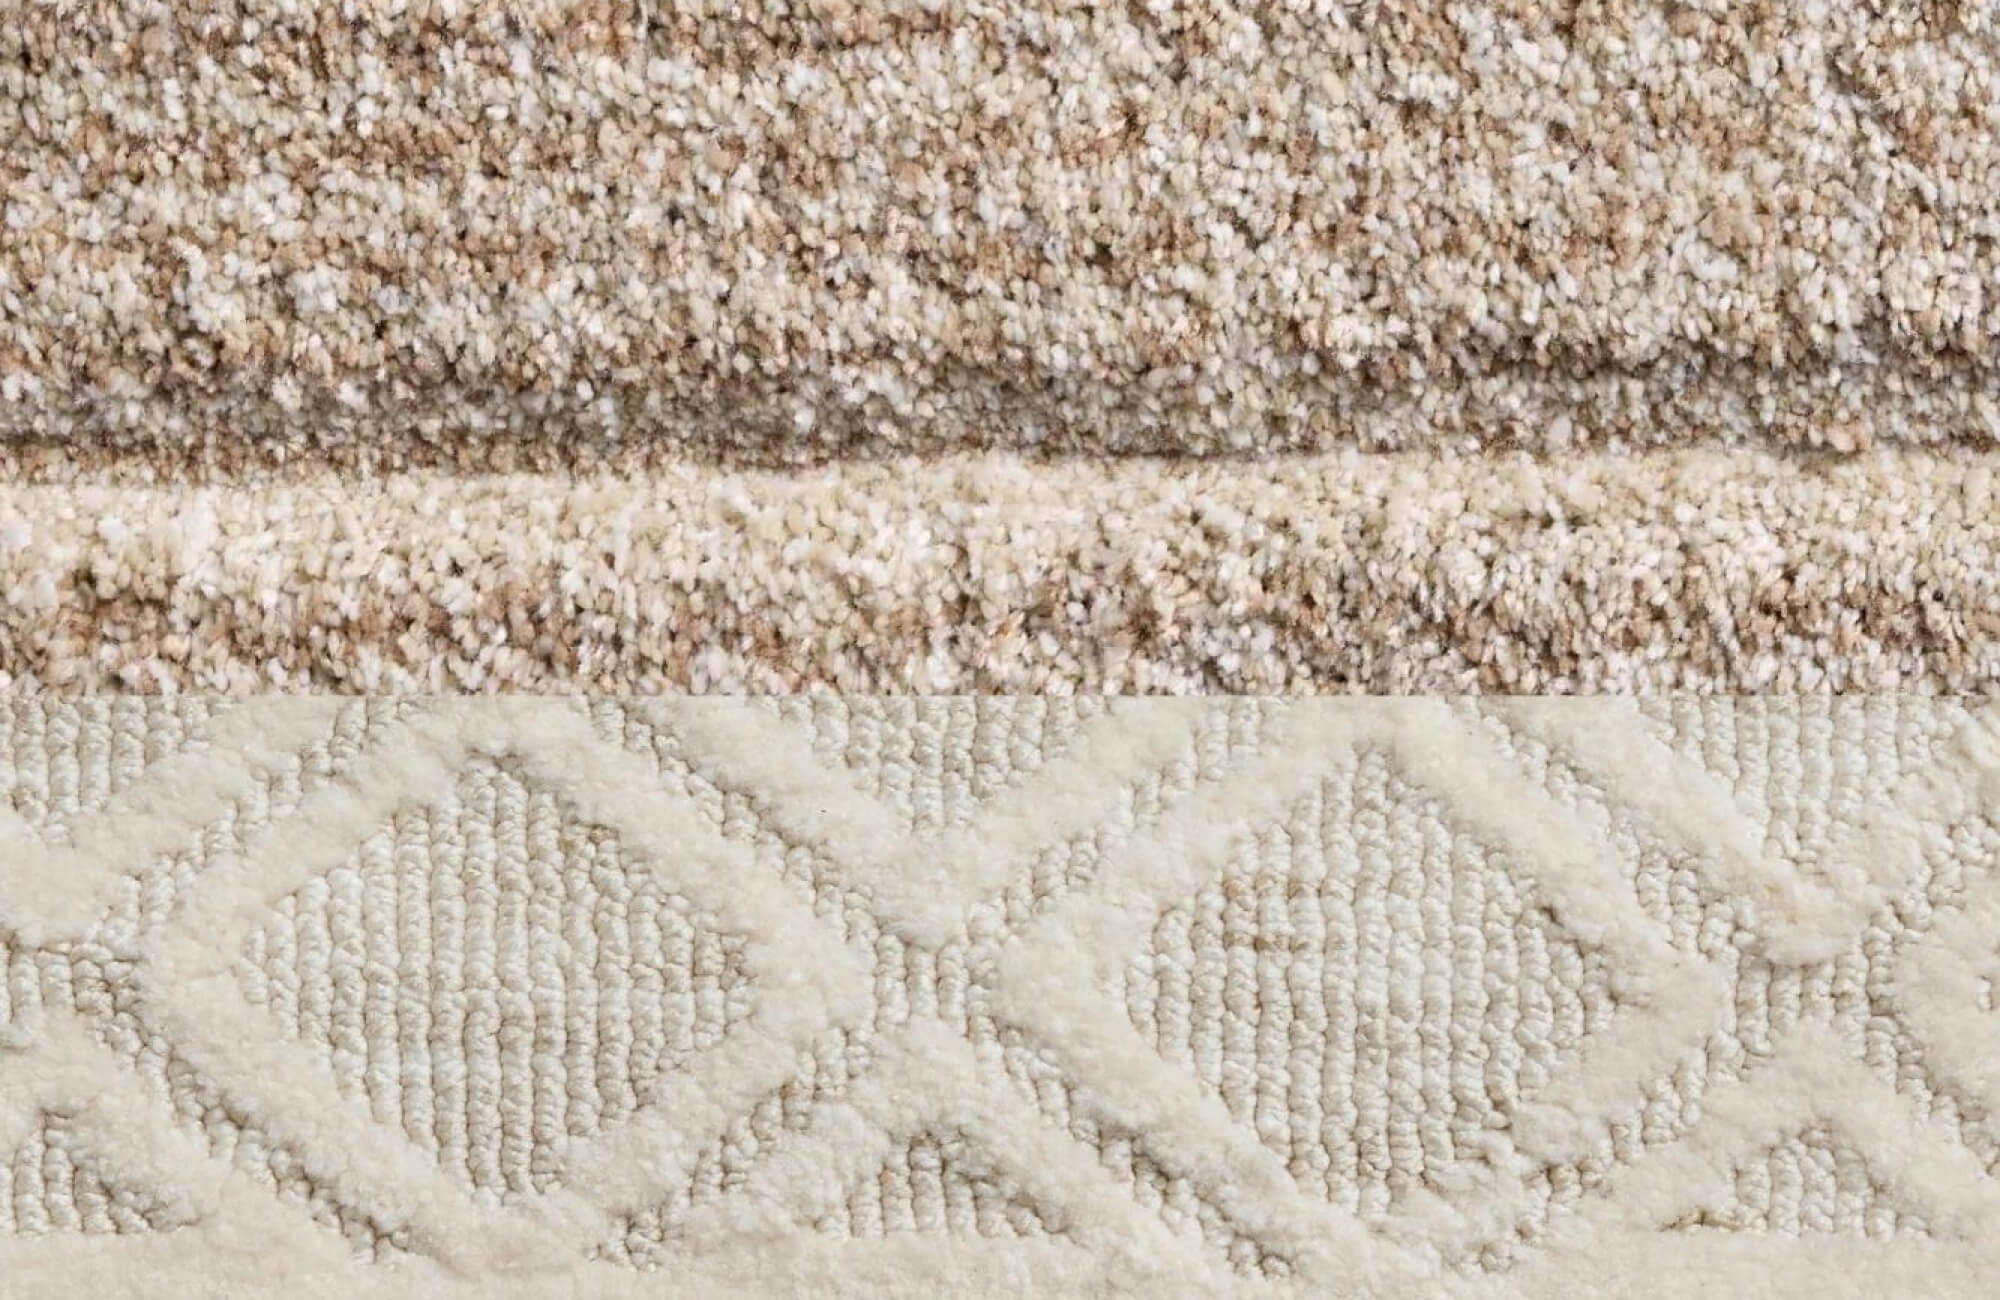
A well-placed rug can bring both practicality and personality to your checkerboard floor. In busy areas, like in front of the sink or stove, low-profile mats or washable rugs can offer protection from spills and daily wear while softening the space visually. They’re also useful in larger kitchens, where breaking up the bold pattern can help the floor feel more balanced and inviting.
Establish a Cleaning Routine
Maintaining a checkerboard floor is straightforward, especially when you stay on top of regular cleaning. A quick daily sweep or vacuum goes a long way in keeping crumbs and debris from settling into grout lines. For a more thorough clean, opt for a pH-neutral tile cleaner that’s safe for your specific tile type; this is especially important if your grout is sealed or you’re working with natural stone.
To avoid buildup, steer clear of cleaners with waxy finishes, as they can leave a dull residue or affect the tile’s appearance over time. Sticking to a consistent cleaning schedule not only helps preserve the contrast between your light and dark tiles but also keeps your checkerboard floor looking polished and refreshed, day after day.
Avoid Harsh Products
In a busy kitchen, it can be tempting to grab strong bleach or acidic cleaners to tackle spills and stains, but it’s best to hold back. These harsh products can break down grout over time, strip away protective sealers, and even damage the tile surface, especially if you’re working with natural stone or a matte finish.
Instead, stick to gentle, tile-safe cleaners that are specifically formulated for tile and grout. When facing stubborn stains, targeted spot-cleaning is often more effective and far safer than using aggressive chemical treatments across the entire floor. Ultimately, the goal is to maintain a clean surface while protecting the integrity and appearance of your checkerboard floor over time.
Bring Your Vision to Life
Installing checkered floor tiles in the kitchen is all about combining thoughtful planning with the right materials. From selecting your tile and mapping out the layout to handling installation and ongoing care, each step helps bring out the full potential of this classic design.
With a little preparation and attention to detail, you'll end up with a floor that’s not only visually striking but also built to last. And if you need help choosing the right checkerboard tile, finalizing your design, or getting installation advice, feel free to contact us! We’re always here to help you bring your vision to life with confidence.